Here is the final edit of my thriller opening, Breath. Please comment your thoughts and enjoy!
Sunday, 4 May 2014
Saturday, 3 May 2014
Evaluation - Question 7
Looking back at your preliminary task, what do you feel you have learnt in the progression from it to the full product?
Here is a re-cap of my peliminary tasks:
- Continuity Task
A short clip practising different shots, and looking into how effective they are in portraying the idea of the scene. The clip starts by tracking someones feet whilst walking. Match on action shots were used when going through the door, cutting from frame to frame showing that no time has passed. Finally, the 180 degree rule is used to film the brief conversation between the two characters, having there head and shoulders in the foreground and the person speaking as the focus. The clip also includes continuity editing, also known as invisible editing, to produce an almost seamless string of video. Here is the finished product.
- Resovoir Dogs Task
On Saturday 25th January 2014, at 11:00 am, filming began for our Reservoir Dogs reenactment. Our first scene was the tracking shot of the group, walking down the small gradient. This was shot on Grove Hill in Harrow. This road resembles the one seen in the original opening and provided us with an accurate background to shoot the video. To achieve the tracking shot, the camera was positioned out of a car window. Once the car began to move, the group started walking down. Shooting the scene from the car provided a smooth gliding motion without the possible judders common with handheld tracking.This made it possible to shoot a scene very similar to the original opening, as you can see from the final product. It took approximately 40 minutes to shoot.
The next scene, or rather scenes, we took was the individual close-ups of each persons face, walking toward the camera. The same location was used, but unlike the 18mm-55mm lens used for the tracking shot, we used a 75mm-300mm telephoto lens instead for the close-ups, as we found it more suitable for setting up the correct framing. The camera was set up on a tripod to maximize stability when filming and zoomed up to about 150mm. As bigger lenses take longer to auto-focus, we decided to use manual focus when filming to reduce the likelihood of out of focus and unusable footage. After each shoot we previewed the footage to ensure it was suitable. Props used included a gold chain, sunglasses and toothpicks, which can be seen in the final video. Shooting the individual shots took approximately 1 hour.
The penultimate scene we shot was the very ending of the original. In this scene, the entire group walked away from the camera towards the road ahead. We shot this further down the same road at a T-junction, despite initially having another location in mind. To shoot this scene, we switched back to the 18mm-55mm wider lens and set it up on the tripod. After clicking record, we all got in position and walked toward the road. Although editing was relatively time consuming. As this was the most simple shot, it only took approximately 15 minutes.
The final scene we shot was in fact the first in the original opening video. The cafe scene was shot in a bar lounge about 5 minutes away from Grove Hill. The friendly owner invited us in and allowed us to film around the round table in his bar. This gave us all the resources we needed to shoot a scene resembling the one in the film.The scene took about 30 minutes to shoot and was a success. It took two takes and when we got the right shot, filming came to a conclusion. After thanking all participating actors for attending, we finished filming at 1:00 pm, 3 hours after starting. We had shot all the footage we needed, to make an accurate reenactment which pays attention to detail to the original. Overall it was a very enjoyable day, and after editing, the video produced was to a high standard of which we can be proud of. Here is the finished product:
What Ive Learned
From these two peliminary tasks, I had taken a lot of knowledge, tips and tricks that helped me in the making of the final product of my thriller, Breath. The continuity task taught me how to use the 180 degree rule. This is where shots of two objects, or in this case people, must not exceed a 180 degree angle. This clearly shows the audience that the two people are facing and talking to each other. Following the rule prevents conversation between characters from becoming confusing to the audience and makes the scene look professional. Although I have not used the 180 degree rule in my final product, I believe it has been beneficial in expanding my media knowledge of which I can take into my future projects.
In this preliminary task, I also learnt much about continuity or invisible editing. This is where action flows throughout each cut, with no elapsed time between frames. This technique is very useful in telling the story to your audience, as there are no jumps in time frame, and each cut begins as the previous one left. The result is one or more seamless cuts showing one action. A good example of this can be seen in 'The Job is Done', as the woman walks up to and opens a door, then sits down. Despite this being a simple action, it is portrayed through 5 cuts, all showing the continuous flow of that action. I also used this technique in my final product when showing the mysterious kidnapper getting in and out of the car. I believe this made it easier for the audience to understand what was going on in the scene.
Match on action was another feature of my first preliminary task. This is where an action, in this case the opening of a door, is shot from opposite angles. This is shown in my video, where we see the woman begin to open the door from one angle, and see her walking through from the other side of the door. I found this method works well in both my preliminary task and my thriller opening, where I used match on action whilst following the teenage boys bike ride. It is a technique that I am also likely to take into future media projects.
Whilst my continuity preliminary task gave me much to learn, the Reservoir Dogs reenactment gave me additional skills and learning curves which I could use to take into my final product. One of the first things I had to do is choose a location for filming the reenactment. I used Google Street-view to find a location which resembled the original film. This technique seemed to be very successful, as the filming location on my Reservoir Dogs task beared much similarity to that in the original video. As a result of this success, I decided also to use Google Street-view for selecting locations for my thriller opening. Fortunately, I concluded the most suitable location was centenary park, just around the corner from where I live. Despite this, Google Street-view had played a key part in finding a suitable place to shoot my final product.
As a perfectionist, I wanted to make my reenactment as close to the original as possible. This required accurate framing of each shot. To achieve this, I switched to the 75-30mm lens, as it not only gave me a better depth of field, but framed the shot better than my wider, 18-55mm lens. This proved that different lenses are suitable for different situations. This task made me put a great amount of thought into my lens selection, which I found a vital skill when filming my thriller opening. Whilst the wider lens allowed me to fit more into frame, the telescopic lens gave me a greater depth of field and far more zooming capabilities. Despite this, the telescopic lens requires a very steady hand or tripod, as it is more sensitive to movement, which despite the cameras built-in stabilization features, can cause shaky footage if moved even slightly. This effect is worsened the further the lens is zoomed in. This knowledge helped me in deciding which lens to use in different shots when filming Breath.
Another skill I had learned whilst filming my Reservoir Dogs reenactment is keeping my subjects in focus. Blurry or fuzzy footage can really detract from the clarity of a shot, and there is a very small margin of error. The most challenging sequence to film was the individual shots. This is because the subject was continually moving toward the camera, and the telescopic lens I was using could not auto-focus very quick, nor was the focal length very long. This meant my subjects kept going out of focus when moving closer to the camera. To prevent this, I had to switch to manual focus, which involved adjusting the focus of the camera using the end of the lens. This allowed me to keep the subject in focus at all times until they became too close for the camera to focus. This gave me a good opportunity to practice using some of the features of my DSLR, and the skills I learnt helped me achieve techniques such as focus pulls in my final product.
Getting the correct white balance made colour accurate within the reenactment. White balance is used to make sure colour recorded are truly representative of what they are in real life. Many cameras have the ability to automatically set white balance, but I decided to perform this manually. To do this, I held a white piece of paper in-front of the camera to show it what the colour of white looks like in the current lighting. This will adjust the colours recorded in shot to what they would be in real life. I did this before shooting my thriller opening to prevent misrepresentations of certain colours, especially of whites.
One of, if not the most challenging aspects of my Reservoir Dogs preliminary task was getting the actors together. I asked many people but their availability or willingness seemed to be a reoccurring problem. This resulted in us being 2 actors short for filming. From this, I learnt a valuable lesson, in confirming actors well in advance to the shooting of the film. This is what I did for my final product, ensuring they were available and willing to help me out weeks in advance. Thankfully they did not let me down, and some good came from the lack of actors during the filming of the Reservoir Dogs task, preventing disastrous consequences of an absence of actors.
Finally, one of the things that struck me about filming and editing the Reservoir Dogs reenactment was the time that was consumed in doing so. Initially, I rather naively thought that filming the shots that we required would be done within an hour. Filming in fact took 3 hours, and editing took far longer still. This rather surprised me as I before thought that filming and editing was not as time consuming as it really is. This discovery helped my accurately plan and schedule my thriller filming and editing. Sticking to this schedule would keep my work efficient, and keep me on track.
In conclusion, my preliminary tasks have helped me to a great extent in learning new techniques and skills of which I could implement into my final product Breath, and also carry this knowledge into future media projects.
Evaluation - Question 6
What have you learnt about technologies from the process of constructing this product?
In the making of my thriller film, I learnt a lot about the technologies that go into constructing a proffesional looking sequence. I used these technologies to my advantage in order to make my video as good as possible.
 The video editing software I used was Final Cut Express 4. This is a professionally used program specialising in the creation of high quality videos. It enables you to include many different video and audio effects/transitions, and is very versitile in enabling you to manipulate media in your timeline or even applying video filters. One I was done editing my video, I could export it in a variety of different formats and resolutions. I chose to export my thriller in the maximum 1080p resolution in a H.264 format that is YouTube friendly. With Final Cut I was able to create my film exactly how I had invisaged, and found the program a pleasure to work with despite its few flaws.
I also used Adobe After Effects CS4 and Soundbooth CS4 in building my video. I used after effects primarily to create animated text overlays and credits. It offered a collection of different animated transitions to choose from, that allowed me to create text that fitted the mood of the film. I also used After Effect's stabilization funtions to reduce unwanted shaking within some clips. Adobe Soundbooth I used for audio manipulation. I could add echos, reverb, and a whole host of other effects to the audio just in a few clicks of a mouse. An example of what soundbooth enabled me to do was at the very end of my opening, where the audio echo's to a silence. This effect was created on Soundbooth.
 During the constrution of Breath, I also learnt much about video itself. Different video formats and frame rates gave me many hurdles to overcome when filming and editing my film. The first step I made was to make my DSLR camera to record in 29.9 fps MP4 format in prefference to AVCHD, as it was less compressed and more editing/conversion friendly. When editing I found it very beneficial to convert the MP4 files into Apple Intrmediate codec. I did this to save time when editing, as rendering is not required in Final Cut when working with AIC files. Finally I exported my video in 24fps H.264 format as it was a streamable file format accepted by YouTube. Before constructing Breath, I never knew there were so many variations of video formats. I learnt that each format has its own characteristics, and some are more suitable than others depending on the task.
Filming my thriller also gave me an oppertunity to experiment with lighting. I found the correct lighting to be very important to the quality of the final product. Fortunately, much of my footage was shot outside on a rather sunny day, therefore light was adequete for filming. Inside however, artificial lighting was required. Not only did this make it easier for the audience to see what was going on, it also reduced visual noise and improved the quality of the image. Looking back at the beggining of my video, indoor scenes could have done with a bit better lighting, but this learning curve I can use to improve my future projects.
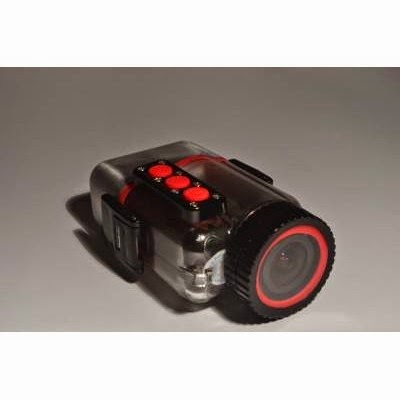 When filming Breath, I used a variety of equiptment to get just the right shots and angles. One of my most interesting peices of equiptment was my Mobius Actioncam in partnership with its custom made waterproof casing. The tic-tac box like size and shape of the camera made it perfect to acheive great action shots not possile with most other cameras. All shots on board the bike were filmed on the Mobius and was ofcourse used for the final, underwater shot. The versitility of the camera and the mounts it could be used with meant I could attach it to pretty much anything. Velcro mounts, headcam mounts, suction cup mounts and handlebar mounts are just some of the attachments I used to acheive certain angles. Despite its small size, it films in full 1080p at 30fps or 720p at 60fps, which is more suitable for extremly fast action.
Despite the actioncam being key in getting certain shots, it was not suitable for everything. When filming off the bike, I chose to record with my DSLR camera instead. Although recording in the same resolution, it provided more megapixels and a better depth of field, along with more pratical reasons like the fact you can instantly watch back your footage and it was easier to get a steady shot.
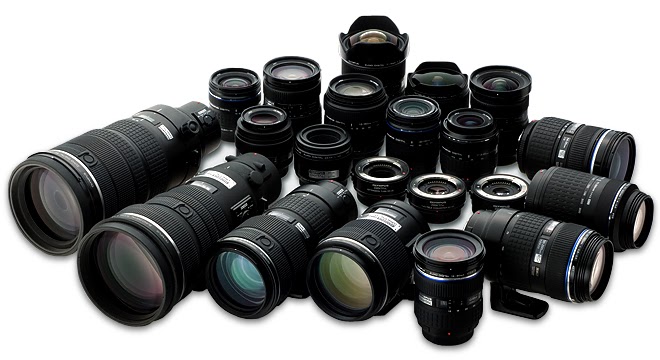
Another concideration I made was which lens I decieded to use for each shot. I used two lenses for my DSLR in my thriller opening. There were an 18-55mm and a 75-30mm teloscopic lens. My judgement was based on how far away the subject was, how still the camera needed to be and how much depth of ield was reccomended. Whilst the telescopic lens allowed me to zoom into objects from a lot further away and gave the shot a further depth of field, it also caused a very small judgement of error when stabilizing the shot, meaning one small jolt could ruin an entire shot. This problem worsens as you zoom further and further in, despite the cameras built-in stabilisation features. The majority of the shots were taken using the 18-55mm lens, as my subjects were generally close to the camera and I could capture wider angled shots, hence it was more suitable for the occasion.
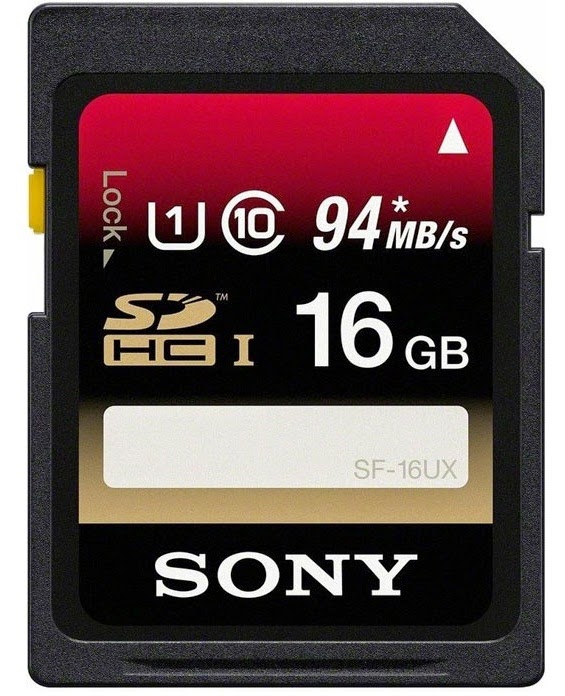
Finally, I had to make whilst filming my thriller opening is the memory of which I would store the footage on. I opted for a 16gb high speed SD card in my DSLR, and a class 10, 8gb mico SD in my mobius. This provided me with more than enough space to hold my footage and I could easily transfer the data from the cards to my computer at high speeds.
Friday, 2 May 2014
Thursday, 1 May 2014
Subscribe to:
Comments (Atom)

